
Harleyquinn's Hammer

Hey! Everyone has been asking how I made my Harley Hammer / Mallet so I figured it was time to post the photo process! I built my hammer in a couple of hours in a day, so its definitely possible to ...hammer... one of these out ;)!
What you will need:
-Two Baskets
- EVA Foam
- Spray Paint / Acrylic Paint
- Spray Paint Primer (to prime your foam before you paint)
- Dowel Rod & Wood Ball (if desired)
- Screws & Screw Gun
- Thin Craft Foam
- Buttons or Water Bottle Caps or Flat Beads
- Hot Glue Gun & Sticks
- Scissors and Razors

Step #1 Baskets, use anything light weight with the shape you’d like for your hammer. Once your desired shape is achieved screw the baskets to the dowel rod.
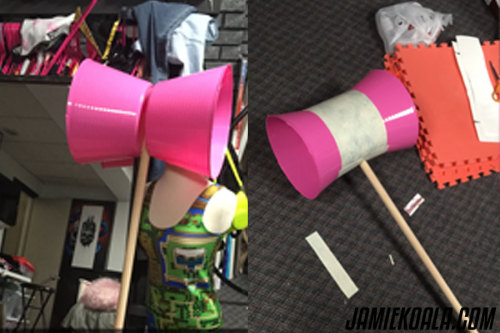
Step #2 I personally thought my shape was too dramatic so I took some lightweight card and wrapped and glued it around the center of the baskets; it also served as extra strength.
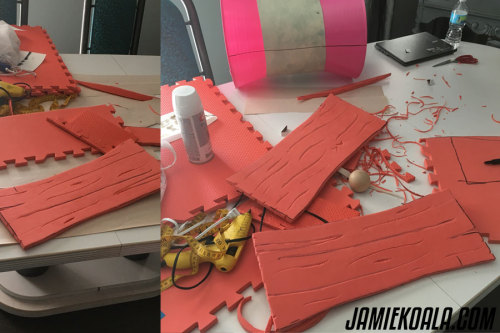
Step #3 Cut out your “wood” planks out of EVA foam. I measured the diameter of the largest part of my basket and the smallest center part. From here I used those measurements to perfectly calculate the size that my 5 planks should be. (EX. 25in diameter outside; 20in diameter center; 25in/5 = 5in; 20in/5 =4in; so your planks would be 5inches across on the outside and tapper to 4inches across on the inside; this method axes out any issues with trail and error or guessing plank size, YAY MATH!).
Step #4 Texture your planks; I used a razor blade to cut out pieces of my planks and cut up the plank edges to make them look more realistic.
Step #5 Trace your basket onto foam to create the end circles; I made mine about 1/4in larger than the basket; then I again textured them with a razor.

Step #6 Prime all of your pieces with spray paint primer or some kind of primer; foam soaks up paint, when you prime the pieces not only does your paint go farther but it also has a cleaner more shiny finish.
Step #7 Once the primer has dried spray paint your pieces their base color, I chose red and black for my planks and brown for the side circles.

Step #8 Use acrylic paint and glaze to create depth with in your wood pieces. Here I painted my pieces with black paint and then used a dry paper towel to rub off the paint color leaving black paint in all of my textures to create depth.

Step #9 I added more paint stroke by dry brushing more black paint on my red planks. On my side circles I dry brushed a light tan color in the center of my circles and accented my name cut out with red paint.

Step #10 Once your planks have all dried you can begin gluing them to the easter baskets; here I used a rubber band to ensure all of the planks were placed where I liked them prior to gluing.

Step #11 Glue and cut long strips of thin craft foam together, spray paint prime them, spray paint them gold.

Step #12 Spray Paint your beads or buttons or bottle caps gold; then glue them to your gold strips of craft foam.
Step #13 I used a brown paint glaze to give my barrel bands more texture and make them look dirty.

Step #14 Glue your barrel bands onto your Hammer with hot glue.
Step #15 Attach a wooden ball to the bottom of your dowel rod if desired and paint the dowel rod to match the rest of your hammer.


